Blog


DIY Lanterns from thrifted placemats
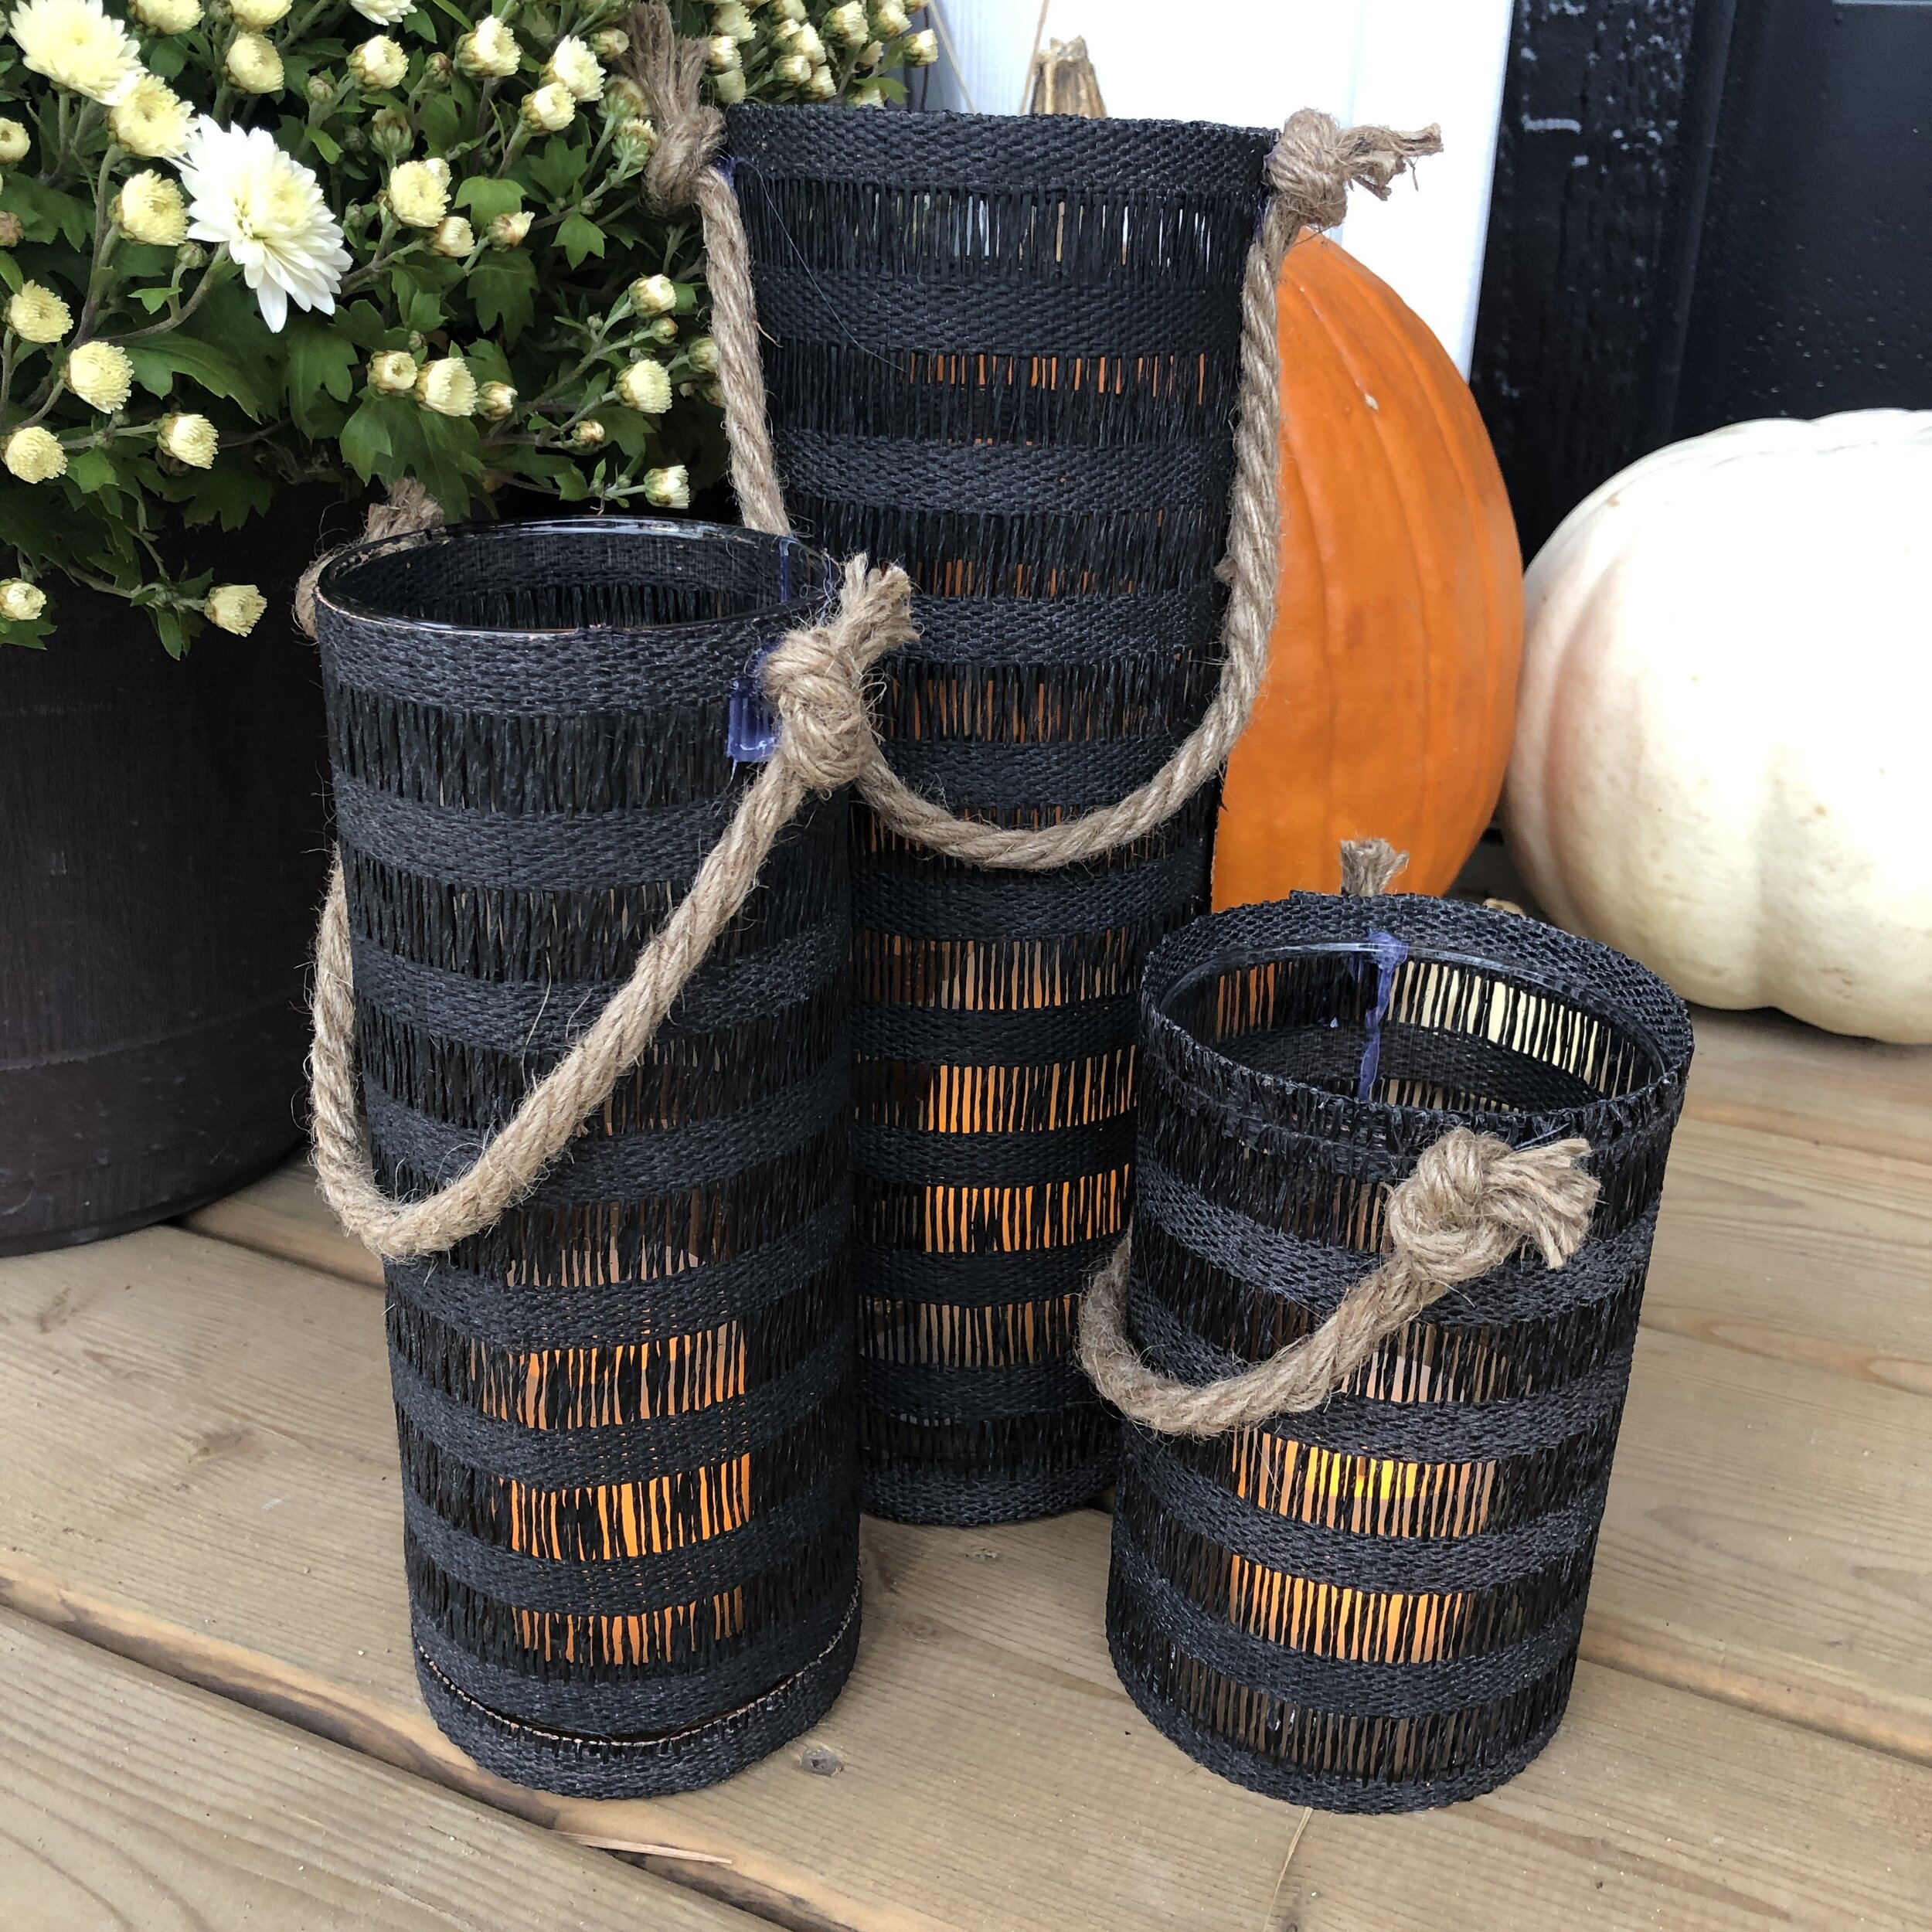
Learn how to repurpose placemats into these cool lanterns!
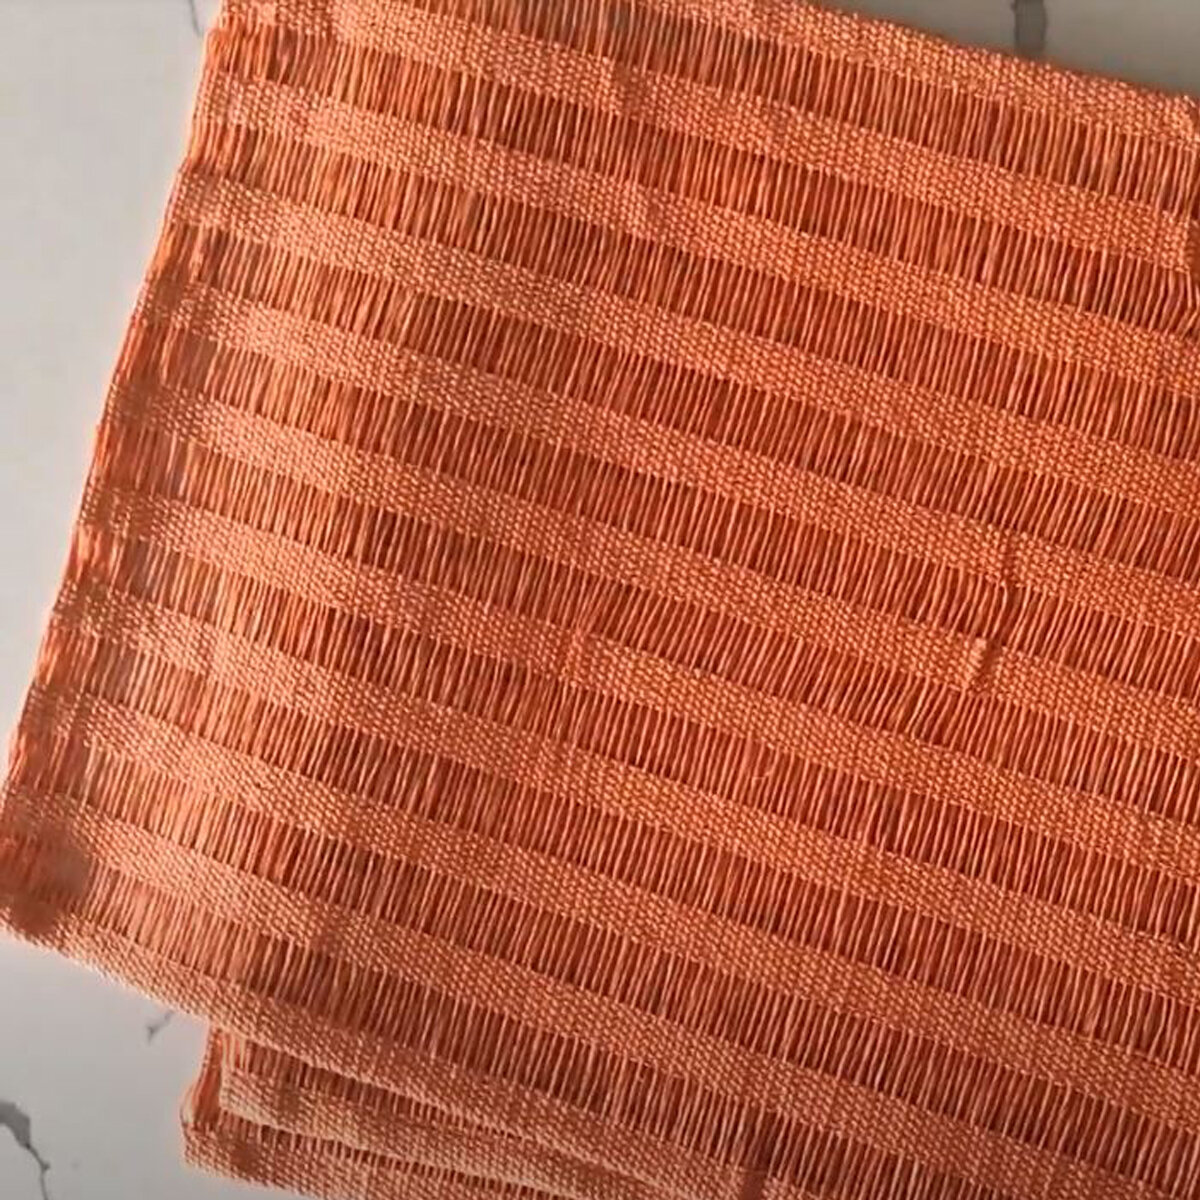
Have you ever picked something up ie/ placemats and a light bulb went off in your head and you could imagine it as something totally different?? I was shopping at one of our local thrift stores and that is exactly what happened! I saw these orange placemats and instantly knew I wanted to make some lanterns for my fall porch. To learn how I took these placemats and made them into these beautiful lanterns keep reading :)
Supplies Needed:
3 placemats from the thrift store
3 glass lantern candle holders from Dollar Tree or Dollarama
Spray paint of choice
Nautical rope from Dollar Tree or thick rope from Hardware store
Hot glue gun and glue
Battery powered candles
Let’s Get Crafting!
Step 1: Spray paint the placemats. You may need a few coats. I had originally sprayed white and it didn’t work as the orange kept coming through. You will need to try it on your placemats.

Step 2: Cut placemats to the height and width of the lanterns. I eyeballed them and tried to keep an edge of the placemats.

Step 3: Hot glue the cut edge (height wise) down the edge of the placemat onto the lantern. Wrap the placemat around the lantern and hot glue the finished edge. Be careful to not burn your fingers :)

Step 4: Make rope handles. I first made a knot on the one end then eyeballed it for the length and added a few inches before I cut. Then I made another knot at the other end. Hot glue the knots to the lanterns.

Step 5: Add battery operated candles (or real but I chose fake) and place lanterns where you want them. I love how they turned out!


I would love to hear your thoughts on how this turned out!!

DIY $8 Pillow
Did you know that you can easily make throw pillows using an inexpensive rug from the dollar store??
I just love it when everything just clicks and works out! I was walking down the isles of Dollarama and I spotted these beautiful mats. They were $4 each!! I grabbed two and kept walking down the isle and spotted some lumbar pillows for $4 each as well! I knew right away what I wanted to do! This came together so easily I was SHOCKED!!

Supplies you will need:
Floor mat from the dollar store
Lumbar pillow from the dollar store
Plastic or large needle
Yarn
Piece of cardboard or a book to make tassels
Step By Step Instructions:
Step 1: lay floor mat on a flat surface good side out
Step 2: in the center of the mat, lay the pillow insert
Step 3: fold over the overlapping pieces to wrap the lumbar pillow
Step 4: Using a blanket stich, sew the edges with the yarn (I used black), until both sides are stitched up
Step 5: Optional - make tassels (see my other post on how to make tassels
Step 6: attach tassels to pillow
Step 7: ENJOY!!!
Watch the full tutorial on TikTok below! Click on image to watch!


What is your favourite Dollar Store diy you have done? I would love to see in the comments!!

Let’s Connect!!!
McGee & Co Dupe Vase
You will never believe what FREE supply to make this high end dupe!
Have you seen these beautiful aged pots that companies like Restoration Hardware and McGee & Co have? They are stunning!!! However the price isn’t!

That led one savvy influencer Jaci Daily to get creative and her mud technique has been sweeping the internet and many DIYers have duplicated her version with stunning results. So I JUST HAD TO TRY IT!!
Let’s Try it!!!
Supplies Needed:

Step 1: In a well ventilated area, spray your selected colour of spray paint. Spray enough coats to cover the vessel. Let dry
Step 2: In a container, add your dirt/sand and add enough water to create a ‘mud’ texture.
Step 3: Cover the entire vessel with the dirt/mud OR cover only the areas you want to be aged. The possibilities are endless! Let completely dry.

Step 4: Using a rag or paper towel, wipe off the dried mud. You can take more off or leave some until you get your desired effect.
Step 5: Optional - you can seal your vessel with clear, matte varnish.


Have you ever tried this technique??? My mind is exploding with all the different colours and surfaces I can do this on! I have a lamp that is going to get this treatment next!


Make this super cute framed artwork using your electrotonic cutter!